Building WordPress on Windows: A Beginner’s Roadmap to Local Web Development
It might be difficult to begin website building, let’s face it. There are several expenses associated with FTP uploads, domain registrations, and hosting. What if, however, you could practice creating a fully working website for free on your Windows PC?
That’s where WordPress for Windows comes in.
Installing wp locally allows you a private playground where you can create, break, and rebuild—without ever logging on to the internet—whether you’re a developer creating custom themes and plugins, a freelancer trying new designs, or an inquisitive novice.
Why Use WordPress Locally?
WordPress is a fabulous content management system for e-commerce, blogging, portfolio, and commercial websites. With an abundance of reasons to install wp on your local Windows computer, one should bear in mind about this.
- Zero Cost: To get started, no domain or hosting is required.
- Offline Development: without Wi-Fi build anywhere and anytime.
- Experiment Freely: Try plugins, themes, or even custom code without fear of crashing a live site.
- Speedy Workflow: Changes appear instantly, without upload delays.
Basically, you get the full power of wp—right in your digital sandbox.
What You’ll Need
To run WordPress on Windows, your computer must simulate a web server environment. Its runs on:
- A web server (typically Apache)
- PHP (a programming language WordPress uses)
- A MySQL or MariaDB database
Setting all of this up manually is possible—but unnecessarily complicated. The good news? There are bundled software packages that set it all up for you with a few clicks.
Top Local Server Tools for Windows:
- XAMPP – Most popular, open-source, and beginner-friendly.
- LocalWP – A modern, GUI-based tool tailor-made for WordPress.
- WampServer – A classic choice built specifically for Windows.
Step-by-Step Guide: Installing on Windows with XAMPP
Step 1: Download and Install XAMPP
- Visit https://www.apachefriends.org
- Download the Windows version of XAMPP.
- Run the installer and follow the installation wizard.
- After installation, open the XAMPP Control Panel.
- Start the Apache and MySQL modules.
If everything is running smoothly, you’ll see green indicators next to each service.
⚠️ Troubleshooting Tip: If Apache doesn’t start, it might be due to a port conflict (usually port 80). You can either stop the conflicting app (like Skype or IIS) or change the port in httpd.conf.
Step 2: Download and Set Up
- Visit https://wordpress.org/download/ and download the latest version.
- Extract the downloaded ZIP file.
- Move the extracted wordpress folder to:
C:\xampp\htdocs\
Optionally, rename the folder to something like myproject for easier access.
Step 3: Create a MySQL Database
- Open your browser and navigate to:
http://localhost/phpmyadmin
- Click on Databases in the top menu.
- Enter a name for your database (e.g., myproject_db).
- Click Create.
No need to create users or change permissions; XAMPP uses a default root user without a password.
Step 4: Install WordPress
- In your browser, go to:
http://localhost/myproject
- Choose your preferred language and click Continue.
- Fill in your database details:
- Database Name: myproject_db
- Username: root
- Password: (leave blank)
- Database Host: localhost
- Table Prefix: wp_ (change it if you like)
- Click Submit and then Run the installation.
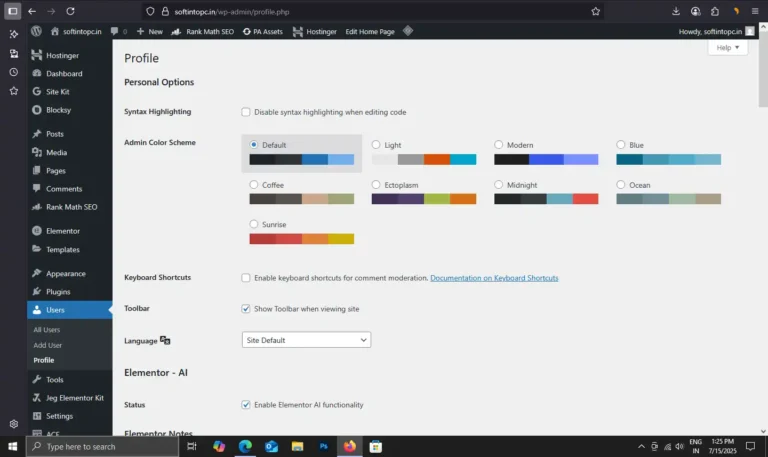
On the next screen, set up your admin account:
- Site Title
- Admin Username
- Password
- Email
Click Install and in a few seconds, your local site will be ready!
What Can You Do with WordPress on Windows?
- Once it is running on your machine, you can:
- Build websites for practice or clients before publishing them live
- Design custom themes or modify existing ones
- Test plugins or create your own
- Experiment with site performance, SEO tools, and accessibility improvements
- Learn PHP and WordPress development in a safe environment
Many professional developers and agencies use local environments as a core part of their workflow.
Migrating from Local to Live
Eventually, you’ll want to take your project online. There are several ways to migrate your local WordPress site to a live server:
Manual Migration:
- Export your database from phpMyAdmin.
- Upload your wp files via FTP to your web host.
- Update your wp-config.php with your new database credentials.
- Use a tool like Search & Replace to update URLs.
Plugin-Based Migration:
Use plugins like All-in-One WP Migration, Duplicator, or WPvivid to streamline the entire process.
- Best Practices for Local WordPress Development
- Test everything locally before deploying updates to your live site.
- Backup regularly, even when working locally.
- Use debugging tools like Query Monitor or WP Debug Bar.
- Use version control (Git) to track changes in your themes or plugins.
- Clean up unused themes/plugins to keep your site fast and secure.
- Bonus: Alternatives to XAMPP
If you’d prefer not to deal with Apache or manual setup, consider using:
LocalWP
- Made specifically for WordPress
- GUI-based, super beginner-friendly
- One-click WordPress installs
- SSL and site switching built-in
DevKinsta
- Built by Kinsta, a managed WordPress hosting company
- Great for working in teams or staging before pushing to live